To add a clef, you must click on the Change Clef icon on the edit tab. You can also decide if you wish to retain your note pitches by leaving the Retain Pitch? option checked, which will transpose your notes to the correct levels. If you uncheck this value, the notes will not transpose and the pitch values will be affected.

The edit tab responsible for all edit operations.
Change Clef
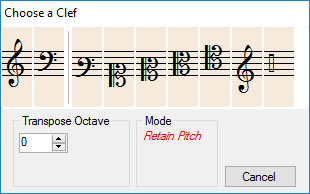
After you select the Change Clef icon, your cursor will change to a tiny blue dot. This indicates that you are ready to click on a measure to insert the desired clef. Upon clicking, the target cursor will change to a red dot while the Choose a Clef dialog box opens.

This is the dialog box to use when adding a clef
From here, you can make your choice on a clef input. The most common clefs are to the left, separated by a line. The unpitched percussion clef is located at the far right. If you wish to transpose your clef, you can click on the up/down arrows. When you are ready to make your selection, click on a clef and you will be asked if you wish the clef to be placed at the beginning of the measure. If you click yes, it will, otherwise the clef will be placed where the target red dot is (the point at which you clicked on the measure).
If you are not happy with the clef placement, you can hover over the clef, and right click to remove the clef, or you can left click and drag the clef if you wish to position it elsewhere within the measure.
Retain Pitch
If this is left checked, the note pitch of that staff will remain unchanged, and the notes will transpose in order to maintain the current pitches. However if this is unchecked, the notes will not transpose in the staff, however the pitches will be affected.
